Example project walkthrough
Perhaps the best way to learn about psiTurk is to go through the steps of configuring and running an experiment. This tutorial will take you through the steps required to run the example experiment – a Stroop task – that ships bundled with a psiTurk installation. This project can be a great starting place for developing your own experiment.
Warning
This guide assumes you already have the psiTurk command line tool installed on your computer. If you haven’t you should begin there and come back when it is installed. Instruction here.
This guide also assumes you are using version 1.0.10dev
or higher of the psiTurk command line tool. Type
psiturk --version in your command shell/terminal
program to verify your version number.
Background
The Stroop effect is the finding that people show interference from reading while naming the font color of words. The task is used to suggest that reading has become a highly “automatic” cognitive skill. You can read more about the Stroop task here. This guide won’t comment much on the psychology of it, rather focusing on the technical aspect of running such an experiment online that consists of a sequence of trials and which records response time and key presses.
Initialize the demo code
The first step is to obtain the archive of code and resources specific to the Stroop demo. Additional experiments are shared on the psiTurk experiment exchange. However, the Stroop demo comes bundled within the psiturk command line tool.
First use the psiturk-setup-example command to place fresh copies of the files into
a new folder:
$ psiturk-setup-example
Creating new folder `psiturk-example` in the current working directory
Copying /Users/gureckis/Library/Enthought/Canopy_64bit/User/lib/python2.7/site-packages/PsiTurk-1.0.10dev-py2.7.egg/psiturk/example to ./psiturk-example
Creating default configuration file (config.txt)
afterward you should have a new folder in the current directory named “psiturk-example” with the following listing of files:
$ cd psiturk-example
$ ls -la
total 16
drwxrwxr-x   6 gureckis  staff   204 Mar 31 12:18 .
drwx------  23 gureckis  staff   782 Mar 31 12:18 ..
-rw-r--r--   1 gureckis  staff   796 Mar 31 11:55 config.txt
-rw-r--r--   1 gureckis  staff  3226 Mar 31 11:55 custom.py
drwxrwxr-x   9 gureckis  staff   306 Mar 31 12:18 static
drwxrwxr-x  19 gureckis  staff   646 Mar 31 12:18 templates
See also
A full description of the individual files is provided here.
A few of the files described on the full documentation will not appear
until the first time you start psiturk and launch the psiTurk server.
Set Your AWS Credentials
To access Amazon Mechanical Turk and other Amazon Web Services features, you need to set your AWS Credentials and also your default AWS region (see these instructions for details).
Configure the option for the demo experiment
Another of the files generated by psiturk-setup-example is the config.txt file,
which contains a variety of experiment and server parameters. These values can be
changed by altering the file in any text editor.
The default config.txt file is already mostly configured to help you test
the Stoop demo. Three options you might want to adjust to begin with are:
- In the
[Server Parameters]section ensure that the port listed is one - that is available on your computer (answer is usually yes unless you have particular firewall software running).
- In the
- In the
[Server Parameters]section ensure that the host is - either
localhost(if just testing/debugging locally) or set to0.0.0.0(if planning to test live on the AMT site).
- In the
See also
A full description of the local configuration file and the meaning of the various option is available here.
Launch the psiTurk shell
All user commands to psiTurk, such as creating a HIT, launching the experiment server,
or approving workers, are issued through the psiTurk command.
To open the shell, run psiturk in a valid experiment folder. You should see
something like this (though probably colorized on your display):
$ psiturk

http://psiturk.org
 ______   ______     __     ______   __  __     ______     __  __
/\  == \ /\  ___\   /\ \   /\__  _\ /\ \/\ \   /\  == \   /\ \/ /
\ \  _-/ \ \___  \  \ \ \  \/_/\ \/ \ \ \_\ \  \ \  __<   \ \  _"-.
 \ \_\    \/\_____\  \ \_\    \ \_\  \ \_____\  \ \_\ \_\  \ \_\ \_\
  \/_/     \/_____/   \/_/     \/_/   \/_____/   \/_/ /_/   \/_/\/_/

             an open platform for science on Amazon Mechanical Turk

--------------------------------------------------------------------
System status:
Hi all, You need to be running psiTurk version >= 1.0.5dev to use the
Ad Server feature!

Check https://github.com/NYUCCL/psiTurk or http://psiturk.org for
latest info.
psiTurk version 1.0.10dev
Type "help" for more information.
[psiTurk server:off mode:sdbx #HITs:0]$
The psiTurk shell prompt displays several useful pieces of information: whether
the experiment server is on, whether you are in sandbox or live mode, and how
many hits are online in your current mode (more on all of these below). While
in the psiTurk shell, all commands entered will be executed by psiTurk. To exit
the shell, type quit.
See also
Start/stop the experiment server
The psiTurk experiment server is a separate process that acts as a custom, local
web server. To launch the server type server on in the
command line interface:
[psiTurk server:off mode:sdbx #HITs:0]$ server on
Experiment server launching...
Now serving on http://localhost:
[psiTurk server:on mode:sdbx #HITs:0]$
Note that the command prompt has changed from showing server:off to server:on
in this example (and also changed form red to green on colorized terminals). You can
start or stop the server at any time using the server on and server off
commands. Typically you want to have the server running when you are testing locally,
testing on the AMT “sandbox”, or running your actual experiment. If the server stops
when running your actual experiment, Internet users will no longer be able to
participate in your experiment even if you still have HITs posted on AMT’s website.
Thus, you should think of the experiment server as meaning your experiment is
current “live.”
Debug/test the experiment locally
Frequently you would like to test your experiment in your browser locally without
involving Amazon’s servers at all. To do so, ensure that the experiment server is
running (the prompt should show server:on). Then enter the command debug. A new
browser tab will open with the first screen of the experiment. The URL string for this
will look something like this:
http://localhost:22362/ad?assignmentId=debug7FIXMF&hitId=debugI3XW1P&workerId=debugY3UNQY
The http://localhost:22362/ part is set in the configuration options under
Server Parameters in the fields “host” and “port”. The default value,
http://localhost:22362/ is a special term that refers to your own computer.
As mentioned above, if you wanted to run this experiment publically you would want
to change the host option to 0.0.0.0.
The remaining part of the URL created random (i.e., fake) identifiers which stand-in for the values that Amazon provides identifying the user, hit, etc… Since by default psiTurk does not allow individuals to take the same experiment more than once (it checks for you to see if the worker has already completed the task or read too far into the instructions) these random values are helpful during debugging.
Important
When running in debug mode (i.e., when the assignmentId, hitId, and workerId
variables are prefixed with the word “debug”) everything proceeds as usual. However,
the server will not block the same user from restarting the experiment
after finishing the instructions (as is true normally). This helps debugging
since you don’t have to keep inventing new fake workerId. However, good to
keep in mind this difference.
The first page that you see in the experiment looks something like this:
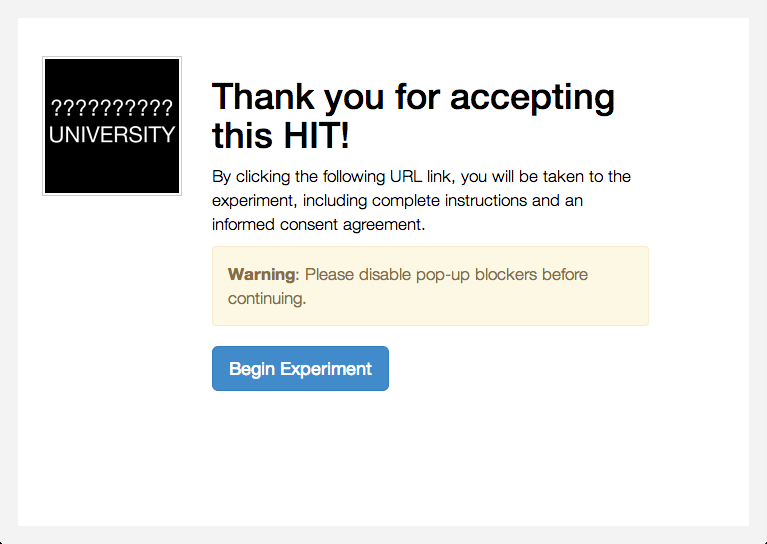
This is the page the AMT worker would see when they first accept the hit. When you click the link, a full screen window will open up which will run the experiment. You can test it now if you like just to get a sense of things. If you want to stop midway through that is no problem. Just close that browser window. Running debug again will open a new browser window and let you repeat the process.
Important
In the typical development cycle you would make changes to the javascript, CSS,
or HTML files in your project locally and use debug to see those changes
and test them. This way the development environment is the same as the
one in which you will eventually deploy your experiment on Mechanical Turk.
Experiment Structure
The basic stroop demo lays out a pretty standard experiment sequence. It is perhaps most helpful to step through this sequence yourself, but conceptually:
First the users view an “ad” for the study (that is what is displayed above).
Then they view a consent form and are asked to verify that they read and understood the consent.
Next they are given a sequence of instruction screens. The experiment logs how long they look at the each instruction screen as well as if they shift back and forth using the next/previous buttons.
Then the main experiment begins which dynamically re-draws the browser window using Javascript. The psiturk.js API records the data and synchronizes it with your server from time to time.
After the experiment finishes the user is given a simple questionnaire about their experiences in the task. Finally control is returned to Amazon (or if debugging a stand-in message is displayed).
While all this is going on the psiturk.js API records if the user is changing windows and prevent them from reloading the browser mid-way into the task to start over.
Launch in AMT sandbox
Now that you’ve tested the experiment locally, you may want to see how it would appear on mturk before running it live with paid workers. Amazon offers this ability through the worker sandbox – a simulated environment that allows developers to test their HITs.
To create a hit in the worker sandbox, first check that the server is on and
that you are in sandbox mode; the psiTurk prompt should say on next to server
and sdbx next to mode. If you are in live mode, enter the command mode
to switch to sandbox mode. If you are in live mode it will post your task
to the live, paid AMT website instead of the free demo site.
When you are in sandbox mode if you type amt_balance you will see you have
a never ending account with $10,000.00 of fake money to spend on sandbox HITs.
[psiTurk server:on mode:sdbx #HITs:0]$ amt_balance
$10,000.00
To create a hit, enter the command hit create, and then answer the prompts
to set up the HIT. Your choices for the prompt answers are arbitrary for now,
since the HIT won’t be completed by real workers. If the host variable
in the config.txt file for this project is set to localhost (default)
or 127.0.0.1 you will get an error reminding you that you server is
no accessible to the general Internet. Please change this option before
trying to post your task on AMT.
[psiTurk server:on mode:sdbx #HITs:0]$ hit create
number of participants? 5
reward per HIT? 1.00
duration of hit (in hours)? 1
*****************************
  Creating sandbox HIT
    HITid: 3SA4EMRVJV2ALPN29ZGP6BDPNBS0P0
    Max workers: 5
    Reward: $1.00
    Duration: 1 hours
    Fee: $0.50
    ________________________
    Total: $5.50
  Ad for this HIT now hosted at: https://ad.psiturk.org/view/oyG8sMCn9ySLTTrumsYgHe?assignmentId=debugFOFTCL&hitId=debugTSXLIB
This example create a hit with 5 “slots” for participants (or 5 assignments). The reward is $1.00 and the participant has 1 hour to complete the task after accepting the HIT before it will be returned. Finally the unique “ad” for this experiment/HIT is displayed at the bottom.
You can also run create_hit non-interactively by providing arguments when
you run the command, for example create_hit 10 1.00 4.
You should now see the number “1” next to “#HITs:” in the psiTurk prompt,
denoting that you have one active HIT in the worker sandbox. If you type
the command hit list active, you should see a description of your HIT
including the HIT id:
[psiTurk server:on mode:sdbx #HITs:1]$ hit list active
Stroop task
        Status: Assignable
        HITid: 3SA4EMRVJV2ALPN29ZGP6BDPNBS0P0
        max:5/pending:0/complete:0/remain:5
        Created:2014-03-31T21:32:27Z
        Expires:2014-04-01T21:32:27Z
To test your HIT, go to the worker sandbox and search for your HIT by entering the name of your requester account in the search bar. You should see something like this:

Click “view a HIT in this group” to open a hit. You should see an ad for your HIT appear on the screen. Click “accept HIT”, then click the link in the HIT ad to open the experiment in a full-screen window. If you complete the HIT in this manner you it should go through all the steps of the AMT process. Afterwards you will have some data in your database.
Accessing your data
The simplest way to retrieve data is using the download_datafiles command. This creates three csv files containing the three kinds of data: trial data, question data, and event data.
If you are using the default SQLite database (see configuring databases)
then another option is to use a GUI tool like Base to access
the data in the participants.db file in your project folder.
If you set your database to use MySQL then you maybe able to connect and export the data using Sequel Pro.
Automatically computing a bonus
Approve/Reject Workers
Todo
Document this
Assigning bonuses
Todo
Document this
Launch “live” experiment
To launch an experiment “live” you follow the same steps as launching in the sandbox but first set the “mode” of the command line to “live”:
[psiTurk server:on mode:sdbx #HITs:1]$ mode
Switching modes requires the server to restart. Really switch modes? y or n: y
Entered live mode
Shutting down experiment server at pid 55158...
Please wait. This could take a few seconds.
Experiment server launching...
Now serving on http://0.0.0.0:22362
[psiTurk server:on mode:live #HITs:0]$
Now if you run hit create it will post a hit on the live website.
You must have enough money in your AMT account to pay for the HITs you
are requesting, otherwise an error message will be displayed.
The amt_balance command will let you check your current balance:
[psiTurk server:on mode:live #HITs:0]$ amt_balance
$178.70
Danger
Remember to switch back to “sandbox” mode when you are finished collecting data so that the command you type will not accidently create tasks that will charge you account money!
Conclusion
This concludes the conceptual overview of the Stroop example that ships with psiTurk.